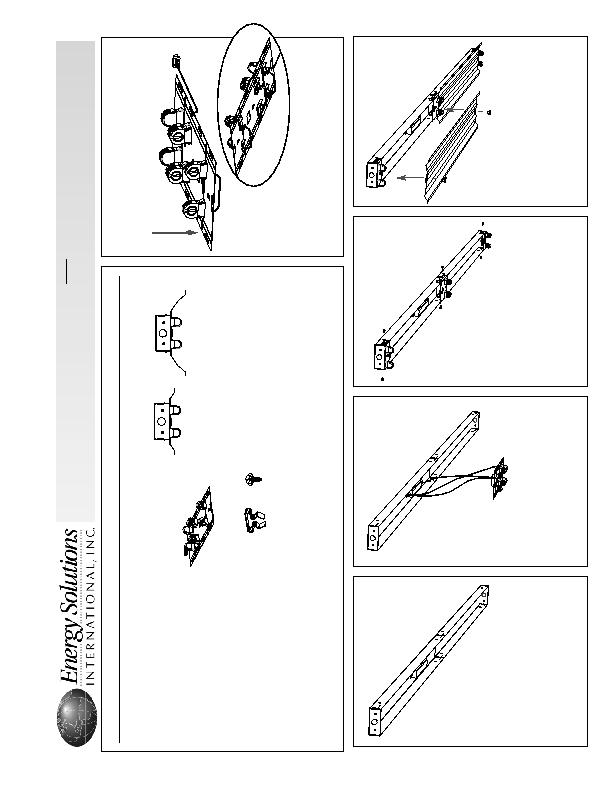
Versa-Kit Installation Instructions
2.
Disconnect Power to the fixture.
Remove the existing lamp
s, ballast
covers, socket-bars, and ballast
s.
Use self-t
apping screws to att
ach
new ballast. Do not electrically acti-
vate ballast.
3.
Att
ach ballast leads to lamphold-
ers and jumper following instruc-
tions on ballast and local and
national electrical codes.
1.
Socket-bars provided with lampholders
inst
alled and prewired with all necessary
wiring.
Socket-bars easily wrap around 4.25" or 5.00"
fixture channels
4.
Bend socket-bar assembly at
perforations to sep
arate bars.
Position bars at ends and center of
fixture and fold sides around chan-
nel.
Att
ach with self-t
apping screws.
Electrically activate ballast.
5.
Att
ach each reflector section to
the socket-bars with (2) quarter-
turn fasteners. Remove protective
film from reflectors and inst
all
lamp
s. Inst
allation is complete.
(
Q
T
Y
)
K
i
t
C
o
n
t
e
n
t
s
(2)
High Ef
ficiency Reflectors (choose profile)
8S Profile
(1)
Socket-bar Set
(1)
Hardware Kit
12S Profile
W
arning:
Read and follow these instructions carefully when inst
alling or maint
aining this
product. Improper inst
allation or maintenance may result in injury or death or significant
property damage. Be cert
ain that all electrical power is disconnected from the fixture
before inst
alling or maint
aining the fixture. Failure to do so may result in injury or death.